So you’ve conquered the soap bar, and now you’re ready to tackle making liquid soap from scratch. This post demonstrates how to make a basic liquid soap. I will try to explain this as simply as it really is, so that you don’t run away in a panic. It is a long process, but it is also an easy one. You can use this as a base to customise your own shampoo, dishwashing liquid, shower gel etc. I’ve included step-by-step photos that will hopefully make the process easier to follow.
If you are new to soap-making, I highly recommend trying my basic soap bar recipe first, or enrolling in my soap-making course. The method for liquid soap is similar, so if you are familiar with soap bars then liquid soap will be a bubbly breeze. But if you haven’t, then liquid soap may sound complicated – which it is definitely not. If you’ve read other recipes, they may have intimidated you to the point of giving up. Yes, it is more involved than soap bars, but it’s still totally doable. Before we lather up, let me deal with a few FAQs…
Frequently Asked Questions
Liquid Soap Recipe: Step-By-Step
Time: 1 hour to soap paste, 3 hours to liquid soap.
Yields: Approximately 2.5 litres (10 standard bottles of shampoo)
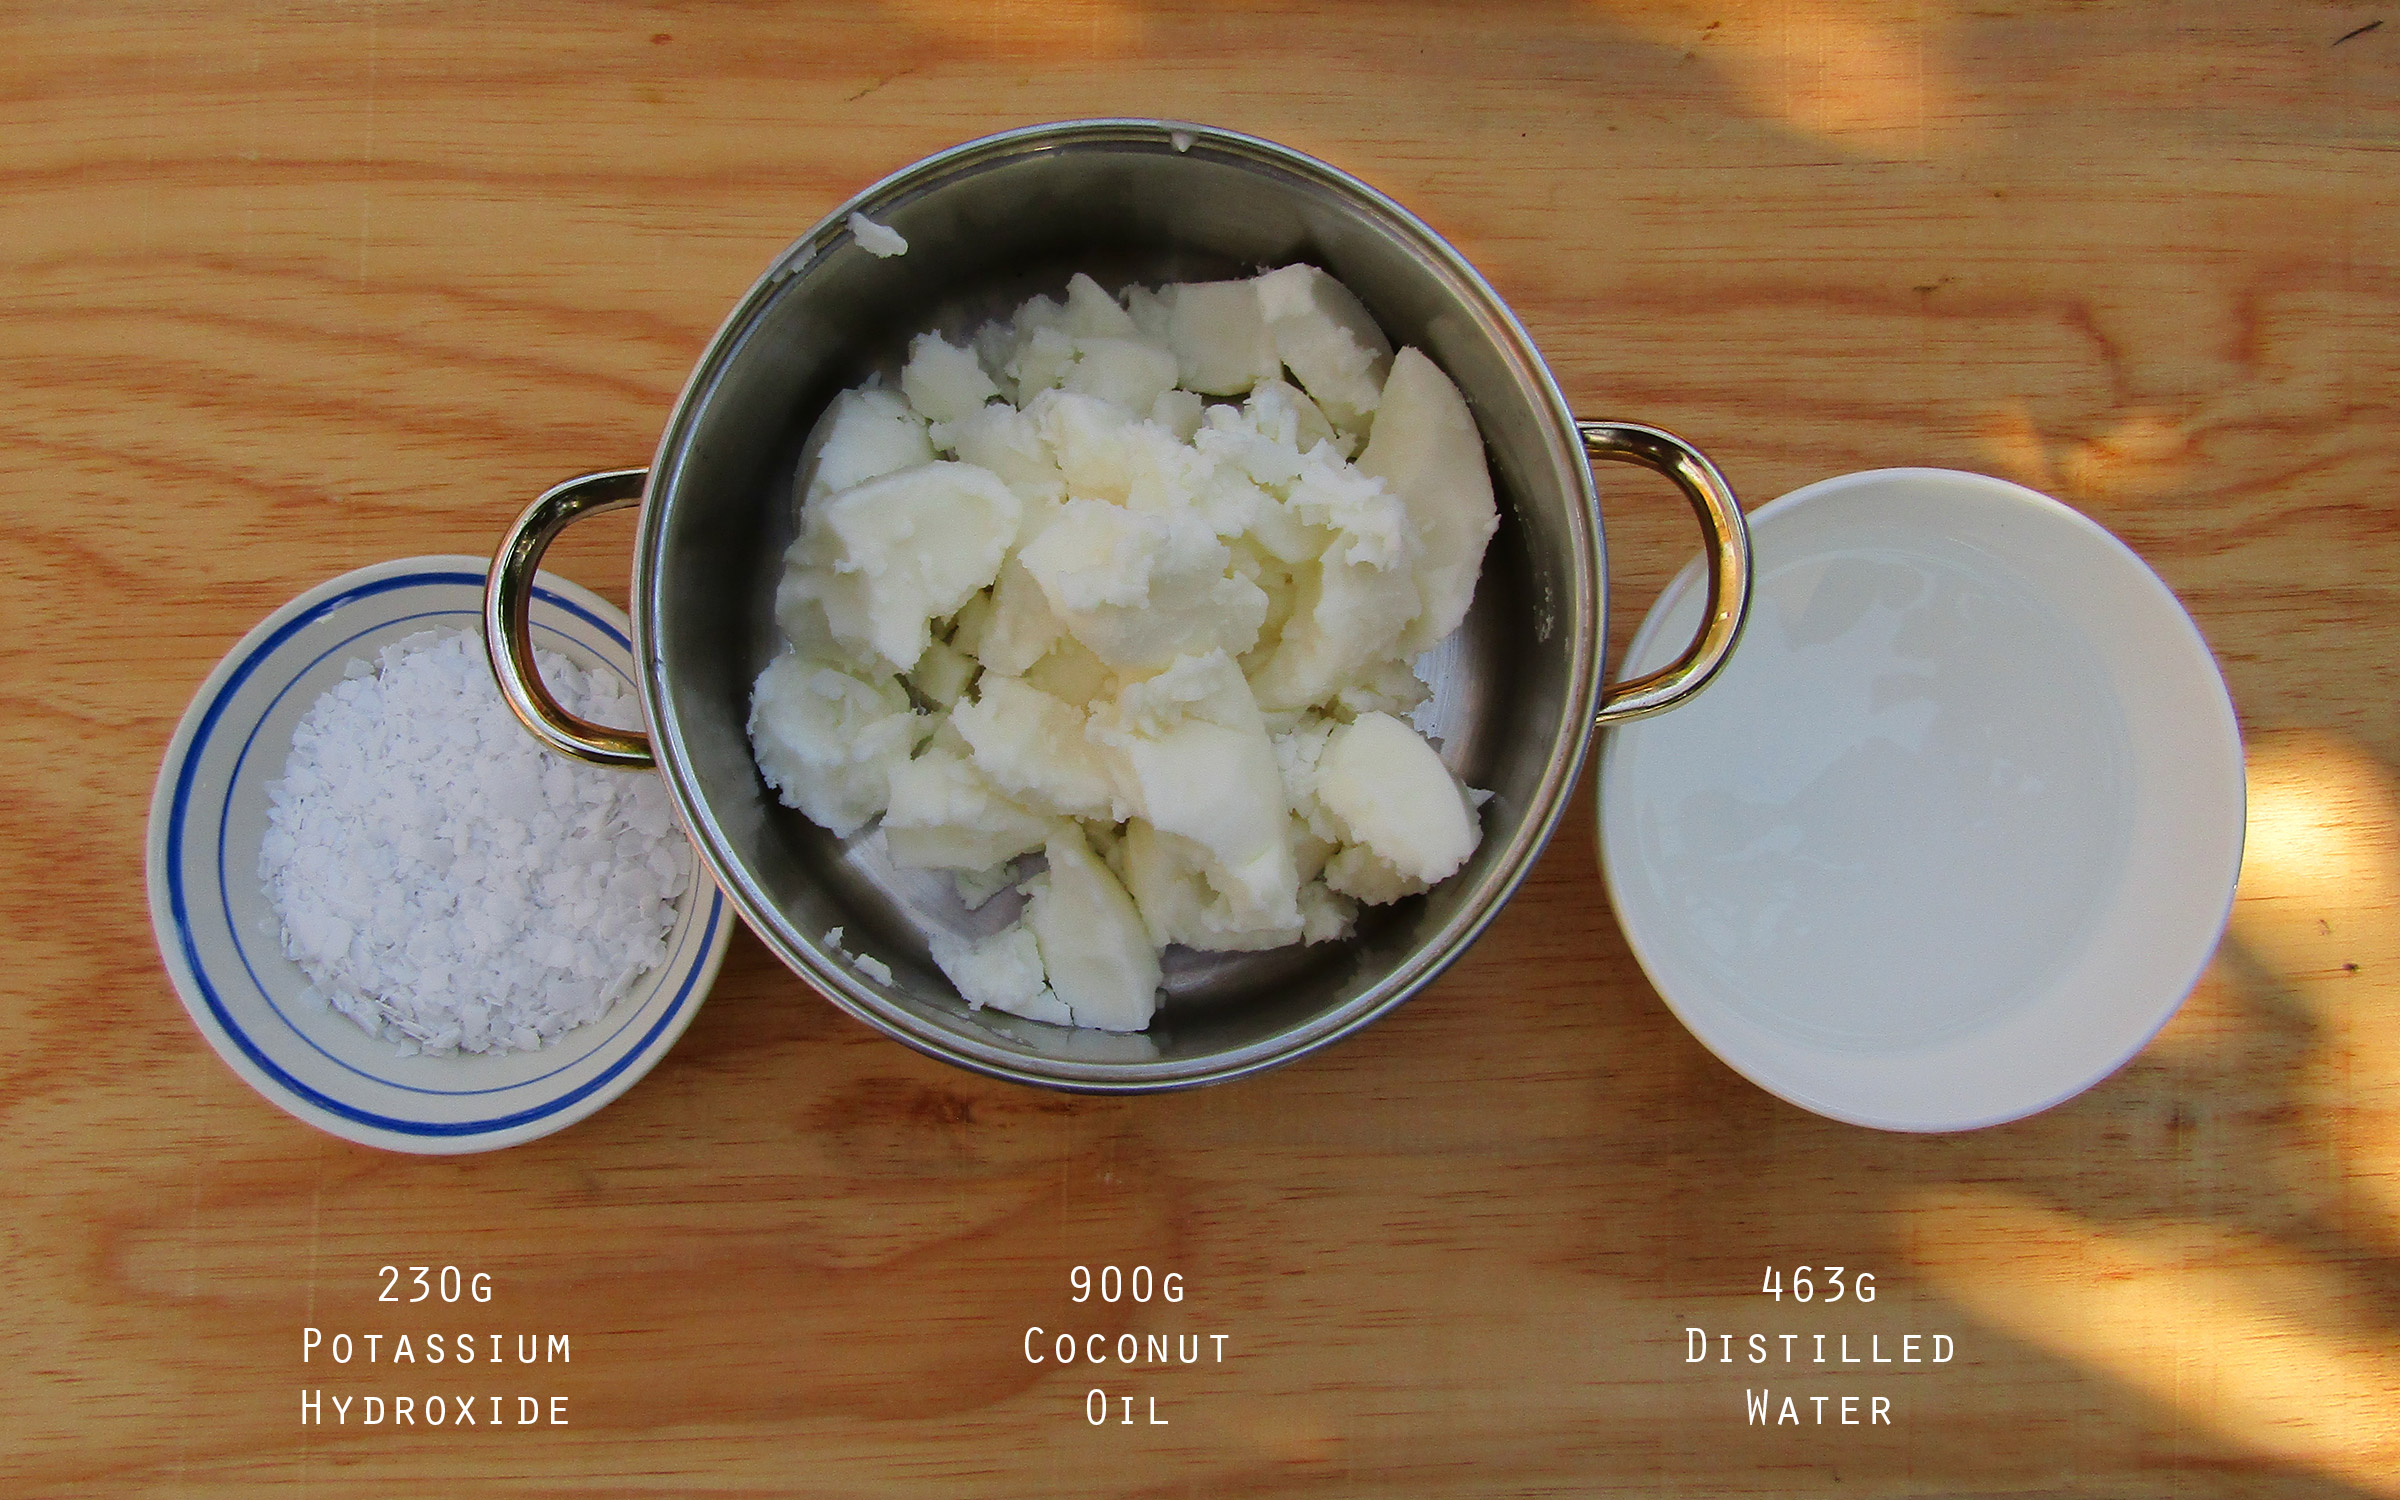
Ingredients:
463g Distilled water (for the lye solution – see part 1, step 2)
230g Potassium Hydroxide (KOH)
900g* Coconut Oil
1 Litre Distilled water (for softening the soap paste – see part 2, step 2)
White vinegar for cleaning any spills.
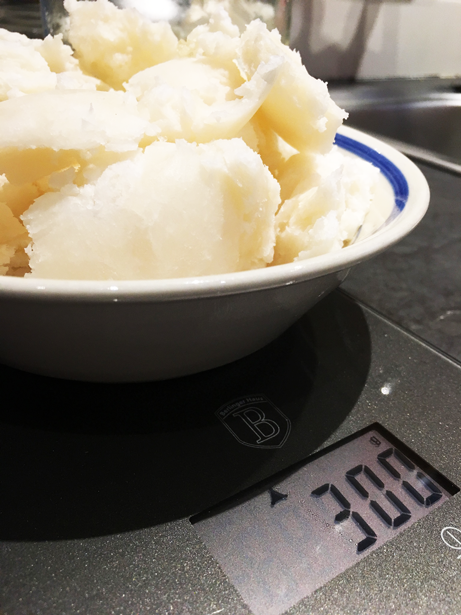
*Note: When you buy one litre of coconut oil, you will get about 920 grams. That is why my recipe calls for 900g, because it is approximately what you will get out of a one litre tub. But always check the weight with a scale to be sure.
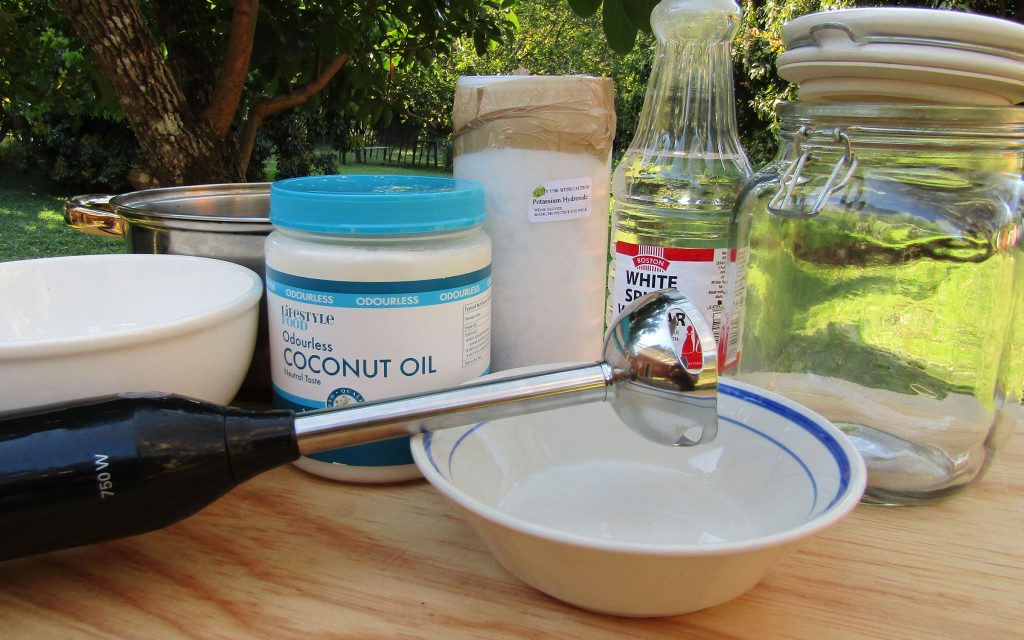
Tools:
- Kitchen scale
- A heat-proof glass bowl (or ceramic) for the water. Check that the bowl is microwave and dishwasher safe.
- Large stainless steel pot for oils & water (minimum capacity: 2 litres)
- Good quality electric blender (cheap ones may burn out)
- Stainless steel spoon to mix
- Two litre jar or container to store your soap paste
- Bottles for your individual liquid soap products
- A cloth soaked in white vinegar for cleaning.
- Funnel (depending on the container you want to store your soap)
Part 1: Cooking Liquid Soap Paste (1 Hour)
- Measure out your quantities exactly with a scale: This recipe is like chemistry. Unfortunately, there’s no compromise and you have to use a scale, and follow all instructions to a tee.
- Make lye solution: Add 230g of potassium hydroxide (KOH) slowly to 463g of water in a heat-proof glass or ceramic mixing bowl (NOT the other way around). Do this in a well-ventilated area. Outdoors away from any pets is best . Do not inhale any of the fumes from the reaction, do not touch the solution. The solution will be murky, it will become hot, and you may hear popping sounds – this is normal. This solution is known as lye.

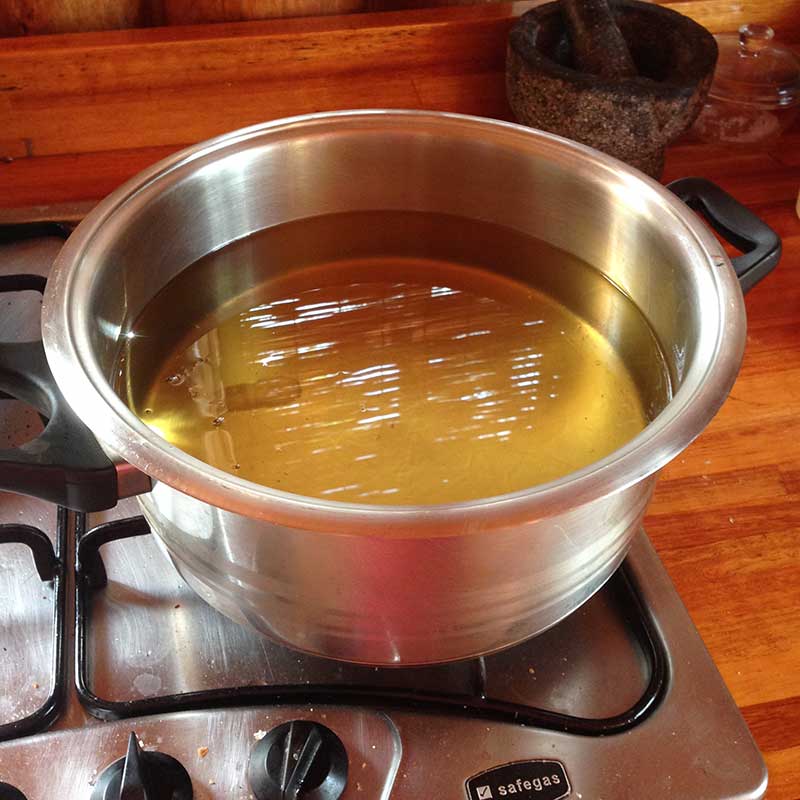
- Start heating your oil: in a genuine stainless steel pot. Do not let it get to boiling point, this is way too hot. If you have a thermometer, the ideal temperature for the oil is 50°C. You should be able to touch the oil and not burn – not that I’m encouraging you to touch hot oil, this is just to give you an idea of what 50°C feels like. The oil is hot, but nowhere near boiling. At this time, your lye solution is cooling down and the lye should start looking more clear (less murky) with time. Make sure that all the KOH crystals are dissolved by stirring with a stainless steel spoon.
- Combine oil and lye: Once both the oil and lye solution are roughly the same temperature, add the lye solution slowly to the warm oil (not the other way around), and start mixing with an electric mixer. Make sure the stove is on the lowest heat. You can check the temperature with a cooking thermometer. The ideal temperature is 50°C. Do not touch the lye mixture to determine its temperature please – you will suffer a chemical burn. Rather touch the side of the glass bowl to determine that it’s warm, or use a thermometer.
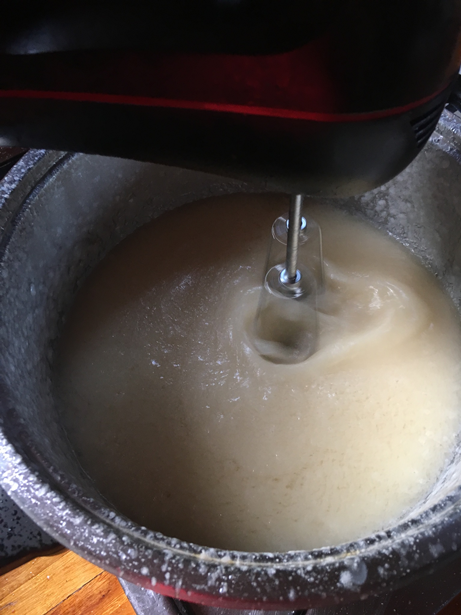
- Blend. First the mixture will look like it’s curdling (like image below). Keep going.
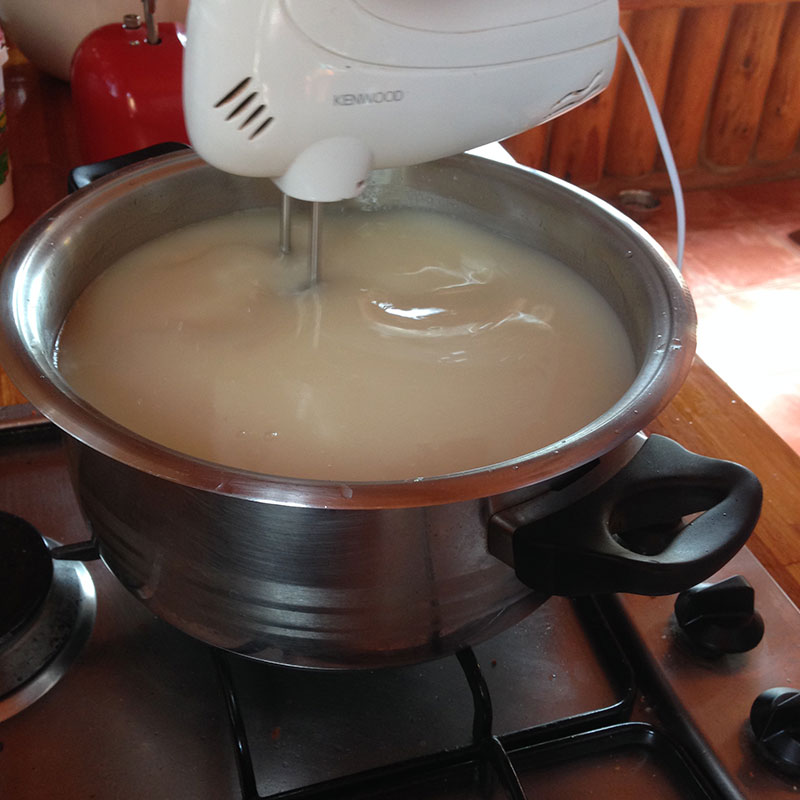
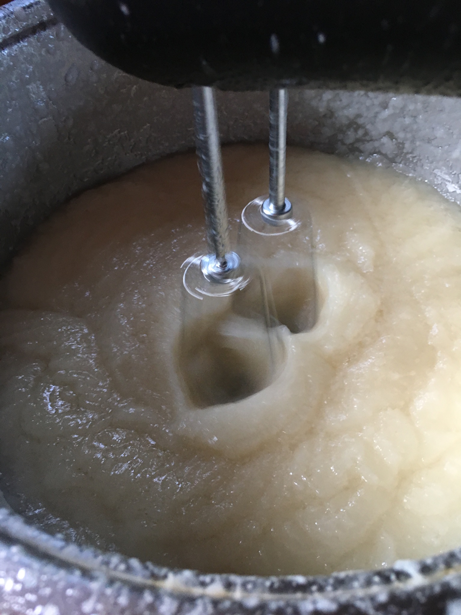
- Keep blending (+/- 20 minutes): Then your mixture will begin to look like apple sauce or thin porridge (image below). Keep going. It took me about 20 minutes to get to this stage with a two-prong mixer and only 5 minutes with an immersion blender (this is why you need a good blender)! The time this takes depends on the oil you use, and the speed of your electric beater. So don’t worry, it’s supposed to take a while.
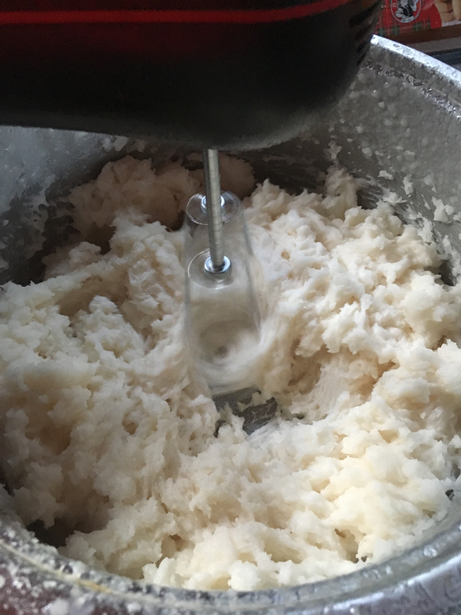
- Keep blending (+/- 2 minutes): Eventually your mixture will become like soft and fluffy mashed potatoes. It took me a further 2 minutes to get to this point. Keep going.

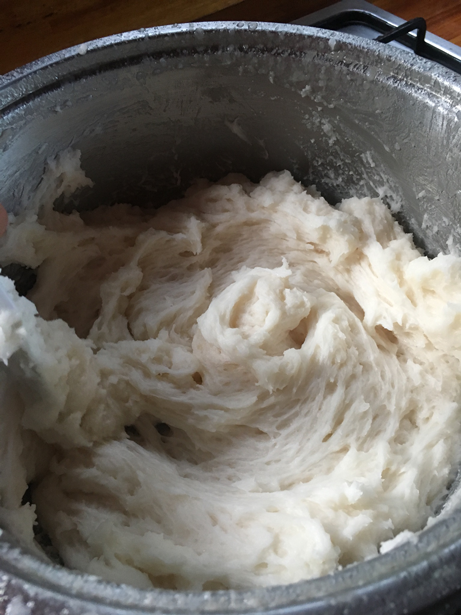
- Keep blending (+/- 4 minutes): Then you will get to the thick and lumpy phase. It becomes like seriously stiff pap! Keep going.
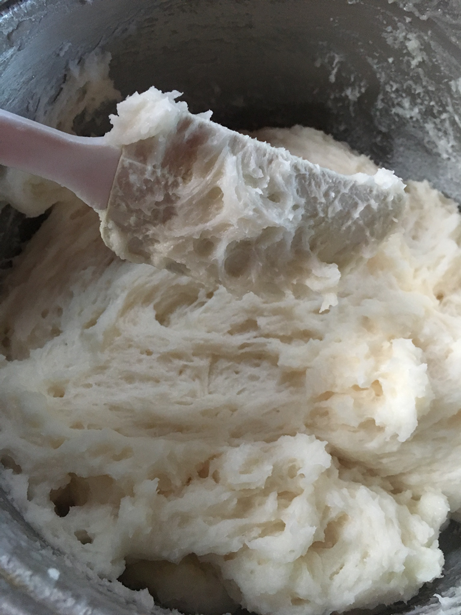
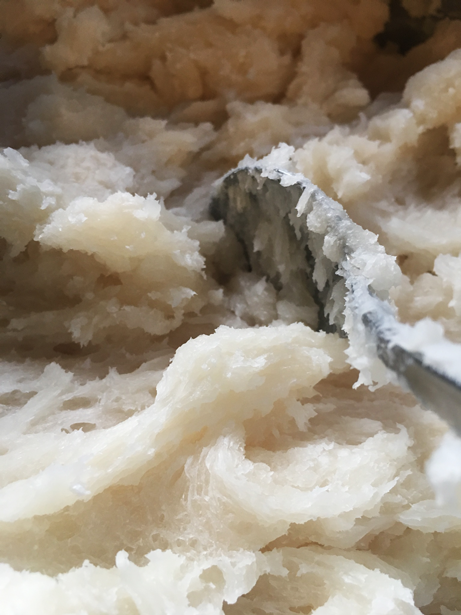
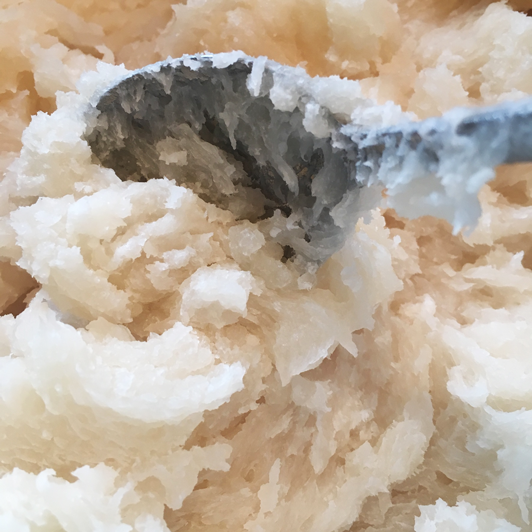
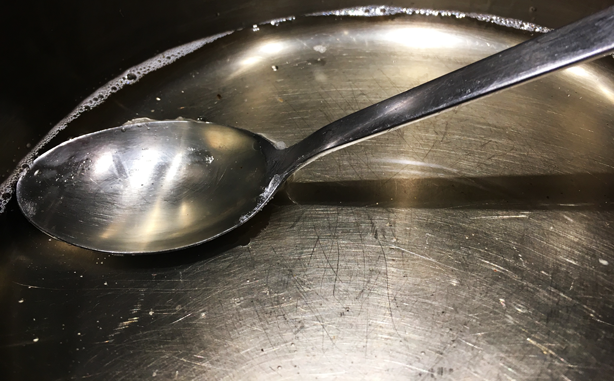
- Mix by hand, and cook the soap for 30 minutes: It is at this point when your blender starts to struggle. So now is the time to switch to a spatula or spoon for manual mixing. The mixture will start to pull away from the edges and become pasty. It will not stick to the pot. It will also become more translucent, but not transparent – kinda like cloudy vaseline. Cook this paste on the lowest heat for a minimum of 30 minutes (maximum one hour), stirring often. If this sounds like too much work for you, throw the mixture into your slow cooker and let it cook for 2 hours on the lowest heat.
- Stop mixing…finally! When you reach this translucent stage, you can rest your poor arms. Your soap is cooked.
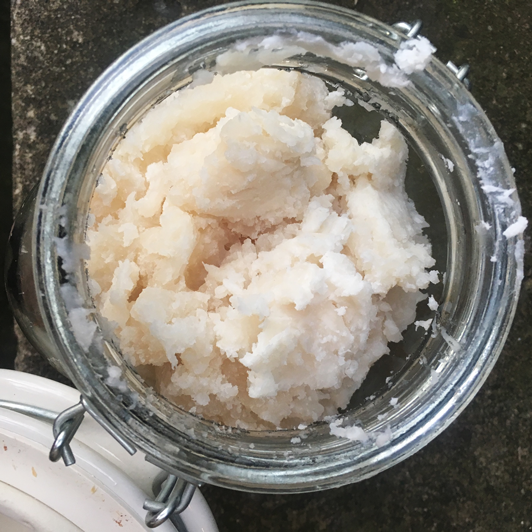
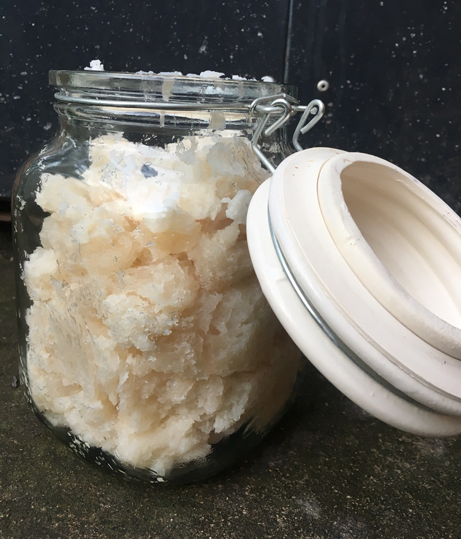
- Transfer your soap paste into a container for storage: You can keep this soap paste for months without it going off, which is better than storing ready-made liquid soap. Water invites bacteria – which needs a preservative. Now we move onto part 2, softening the paste into a liquid soap.
Part 2: Softening Paste To Liquid Soap (2 Hours or Overnight)
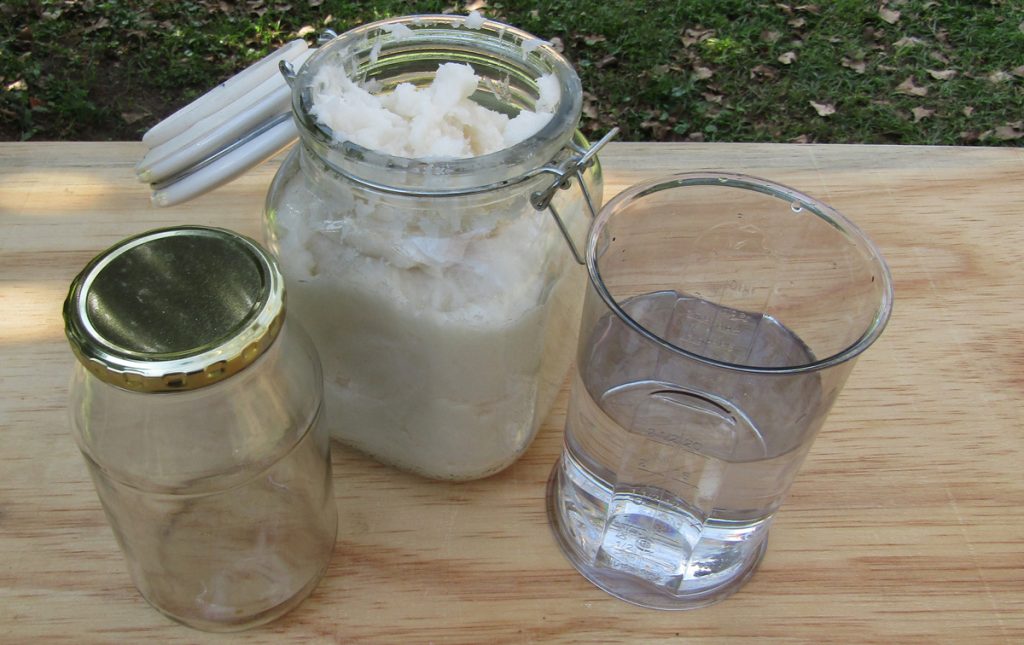
- Measure out the soap paste you need: The dilution ratio is one part soap paste to one part distilled water (1:1). So if you want to make a cup of shampoo (250g), measure out soap paste that is half of your final quantity. I.e. 125g of soap paste if you want 250g of shampoo in the end.
- Measure out the distilled water: Measure out the exact same amount of distilled water as you did soap paste. If you want a thicker texture, use less water.
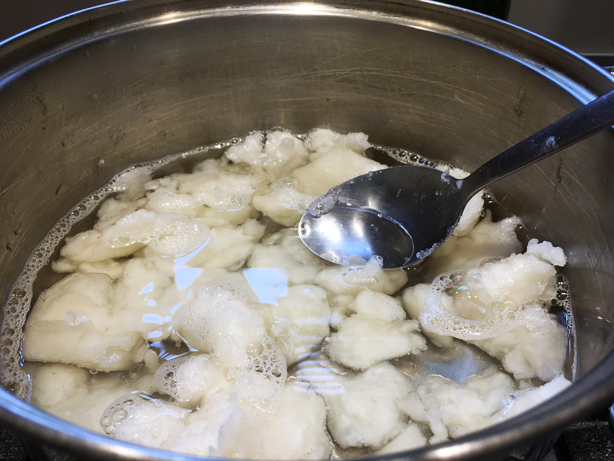
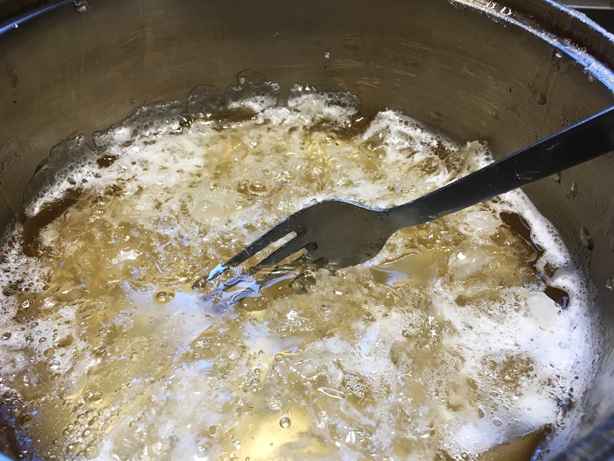
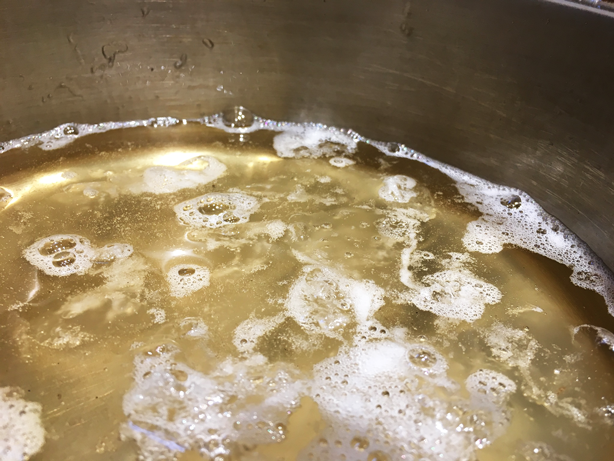
- Combine soap paste and distilled water: You have two options. You can soften the soap paste in the water over heat – so using a double boiler, slow-cooker, or in a pot (lowest heat), stirring every few minutes. This is quicker. Or you can add boiling, distilled water to the soap paste and just let it sit overnight in a sealed container. This requires less effort. When you wake up it should all be dissolved. If not, mix it with a fork breaking up the remaining bits, and let it stand a little longer. Here are some pictures of the phases that it goes through on the stove until completely dissolved into liquid soap:
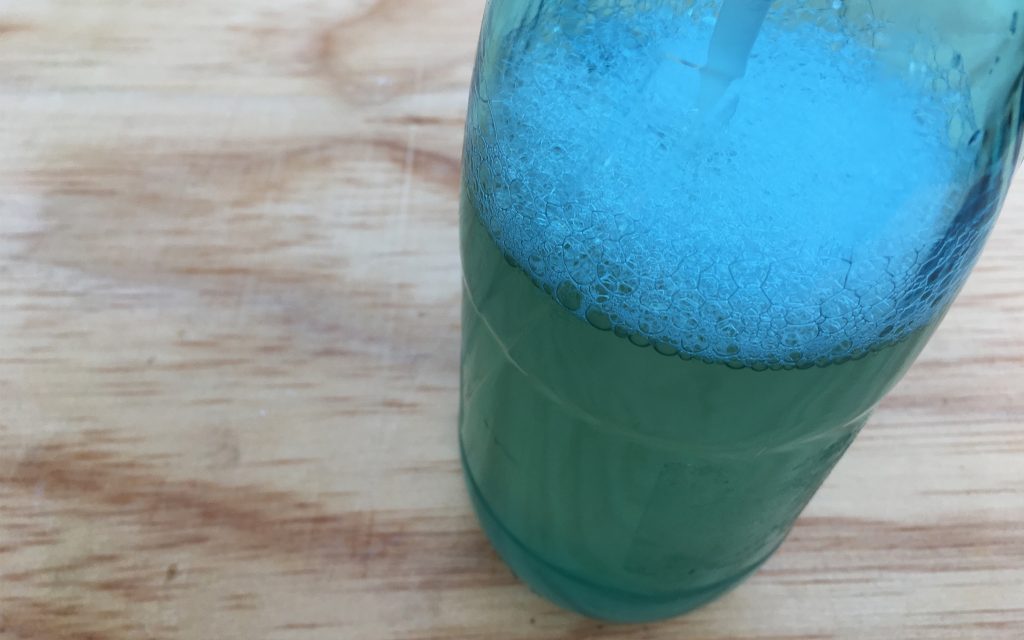
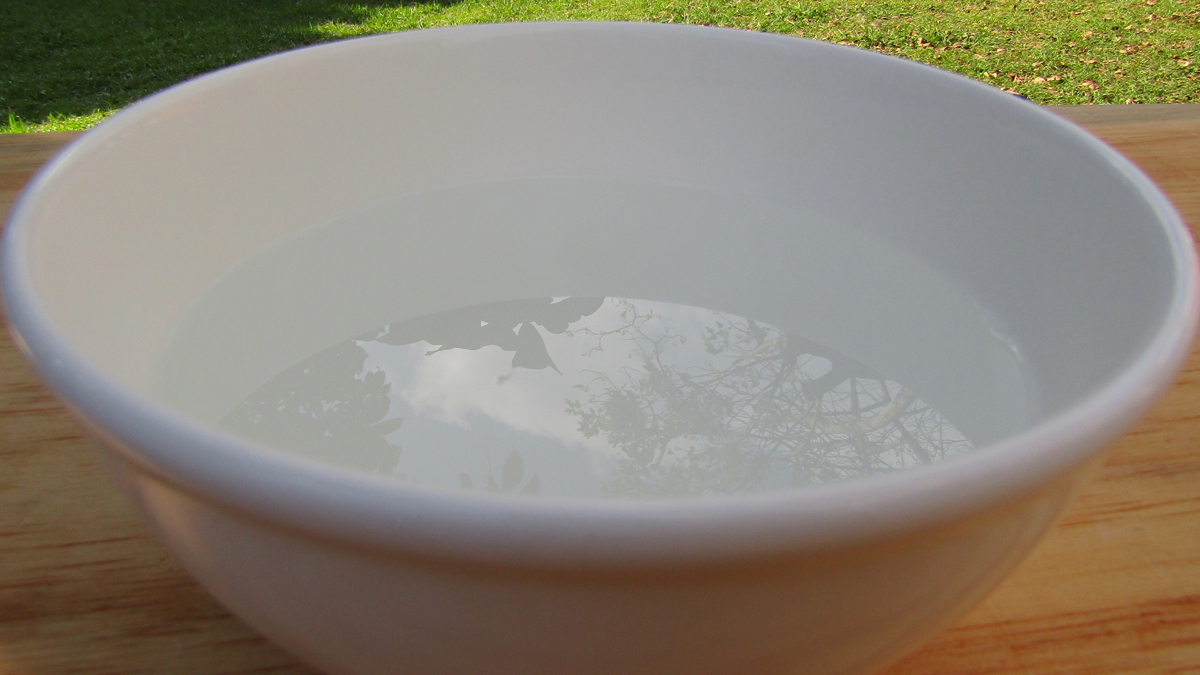
Here is an image of the soap paste just sitting in a jar of distilled water overnight. It will dissolve completely by itself into liquid soap. This requires far less effort than the stove method shown above, and is my preferred method to dissolve soap paste.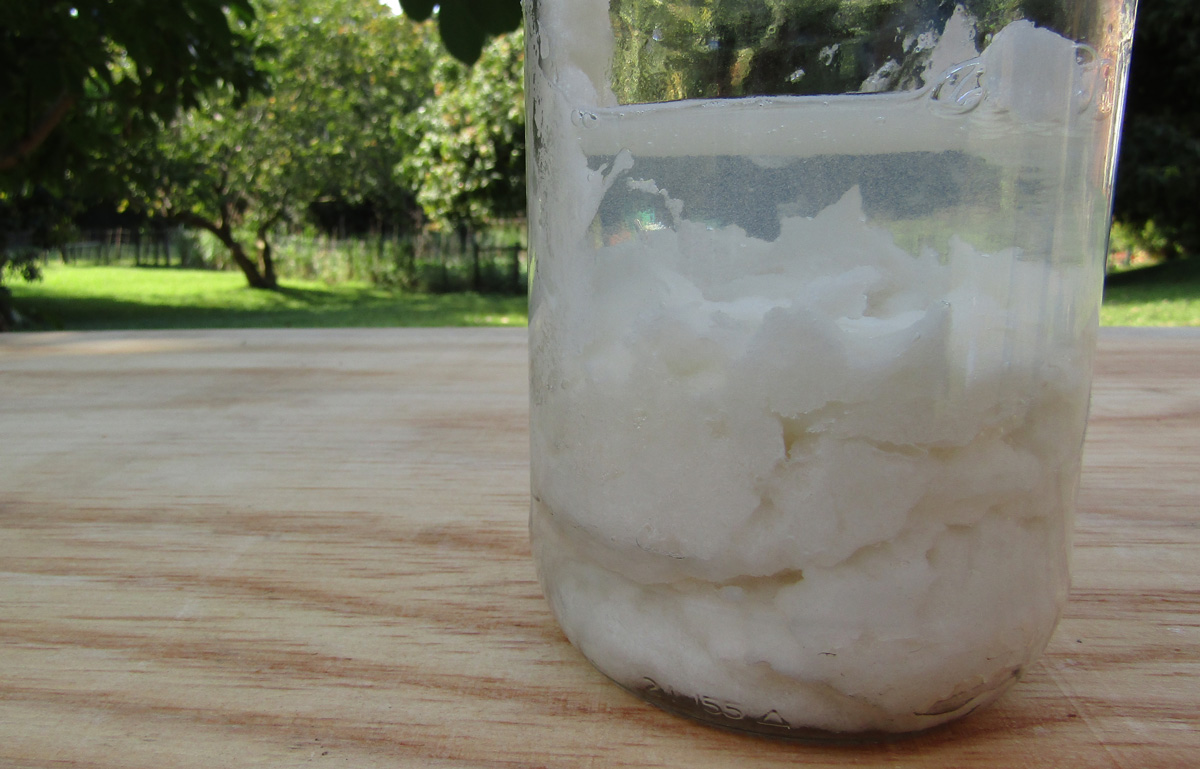
- Bottle it. When the soap paste is dissolved, you will have your final liquid soap! This consistency will remain and it will not separate or harden. This is the base for your liquid soap.
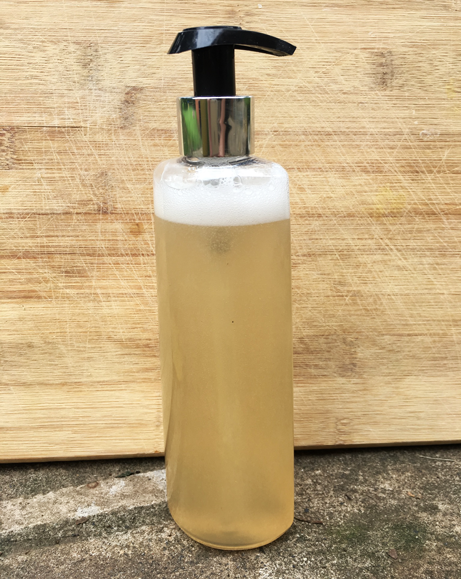
- Let it settle for a day (optional). It is safe to use your liquid soap immediately, but I like to let mine stand for a day just to settle. Then I add my additives like essential oils, nourishing oils etc.
There it is, you have made liquid soap from scratch. You can now customise this base by adding additives that suit your needs whether that be for household cleaning or for skincare.
Part 3: How to thicken liquid soap
This is completely optional and unnecessary, but it’s cool if you like to go the extra mile.
Before bottling your liquid soap, make a salt solution. For this to work, you cannot add more than 2% of salt to the liquid soap, otherwise you risk it seizing and separating. Mix 10g of salt in 10g of boiling water for every 500g of ready-made liquid soap (i.e. 2% salt). Once dissolved, stir this solution into your already diluted soap a little bit at a time until you reach a viscosity that you are happy with. Never use more than this 2%. Your soap should thicken a bit as you stir.
Rule of thumb: For every cup (approx. 250g) of liquid soap, mix 5g of salt in 5g of water. This is the maximum.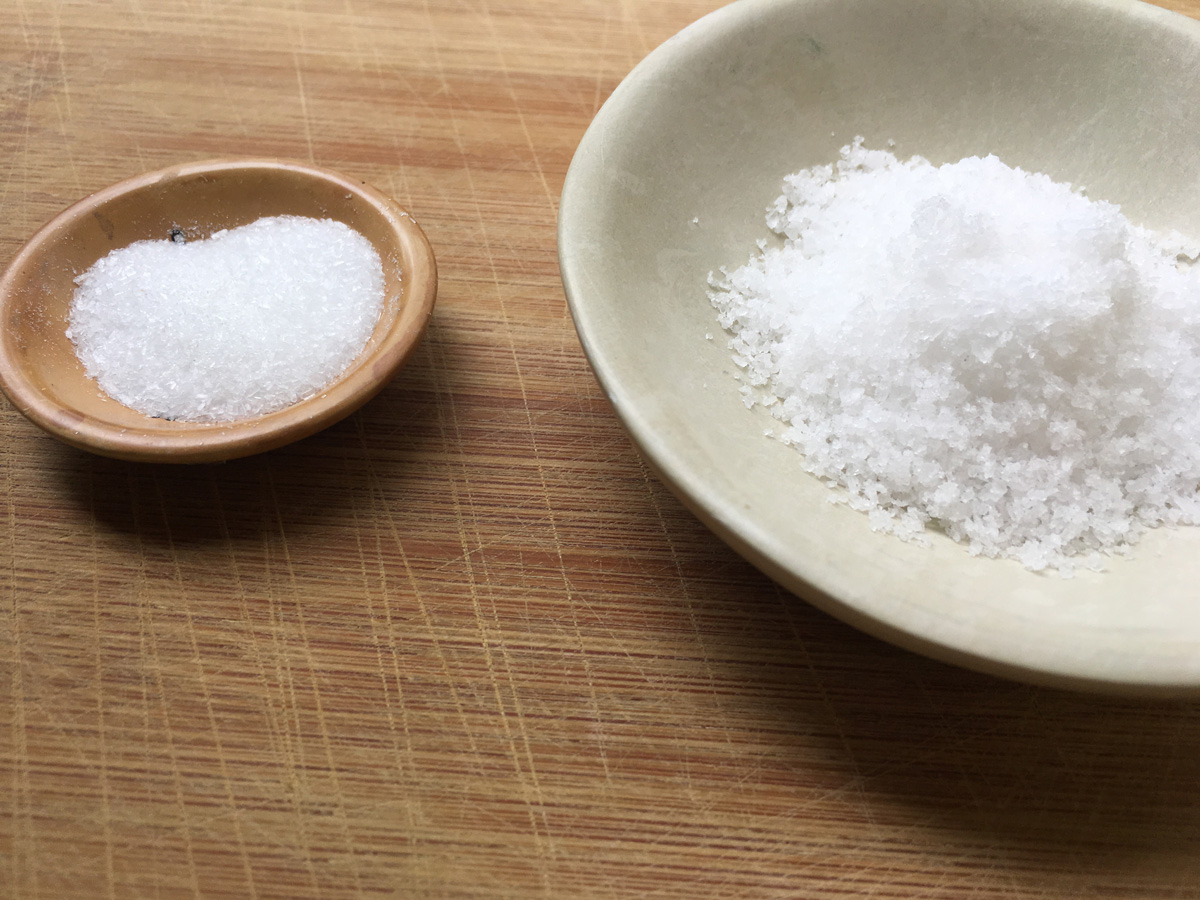
Recipe Variations & Substitutions
Unfortunately, you cannot substitute any oil for the coconut oil in this recipe, you must use coconut oil. The recipe needs to be recalculated for a different oil, because each oil requires a different amount of potassium hydroxide to saponify. I use 100% coconut oil for a cleansing and bubbly soap base.
I customise this base to be more nourishing later by adding glycerine etc. However, coconut oil results in a water-thin liquid soap, even though it is bubbly. You can thicken it with salt or xanthan gum (see part 3 above). Olive oil results in a thicker textured soap, but not as bubbly. Each oil has its own soap properties.
I don’t recommend using less than 500g of oils, because that can be too shallow to blend properly (unless you have a tiny, narrow pot).
Cost & Shelf Life
Cost Price: R15.63 per 250g of liquid soap.
Lasted me about: 3 months using the soap paste to make everything from hand soap, dishwashing liquid and shampoo.
Shelf life: The undiluted soap paste has a shelf life of about 2 years, whereas the liquid soap (after you’ve diluted the paste with water) has a shelf life of about 6 months if you used distilled water. This is why it is better to not dilute all the soap paste at once, but to rather store the paste and use it as you require more liquid soap. Scoop some paste out of its jar, and dilute it when you need some more liquid soap.
*Costs accurate at the time of writing, and based on best retail prices I’ve found.
Challenge
- The time that it takes to make. I think the end result and versatility is worth the effort. By making soap paste in bulk, you can dedicate one Saturday afternoon a year, which is manageable.
- Potassium hydroxide is not as readily available as caustic soda (for soap bars). You can find caustic soda in most hardwares, but need to buy KOH from a soap specialist store. (Buy online here).
Cherry On Top
- Customizable: You can completely customize this soap recipe. You can add any essential oils/ scents and other additives. This base can be used as a body wash, shampoo, dish washing soap and laundry soap etc.
- Less waste: You can make natural soap in bulk for all your needs from household cleaning to body care, and save the cost and packaging waste of purchasing it all the time.
- Eco-friendly and only contains what you need – there are no unnecessary chemical additives.
Recommended Retail Options
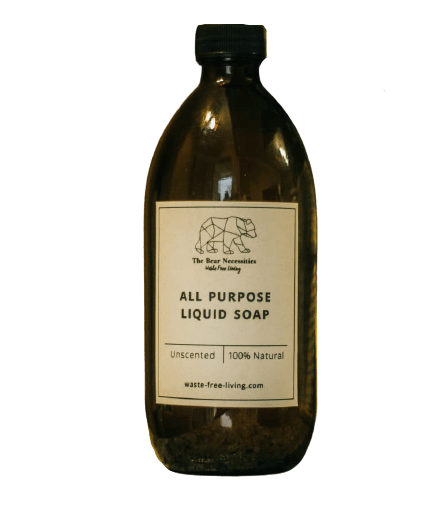
If you don’t have the time or interest in making soap, my first recommendation is the fragrance-free liquid soap made by The Bear Necessities. I have personally reviewed and approved their formula, and I can confidently say that their liquid soap is the best retail substitute for my recipe. I also support The Bear Necessities, because they make every effort to avoid plastic packaging.
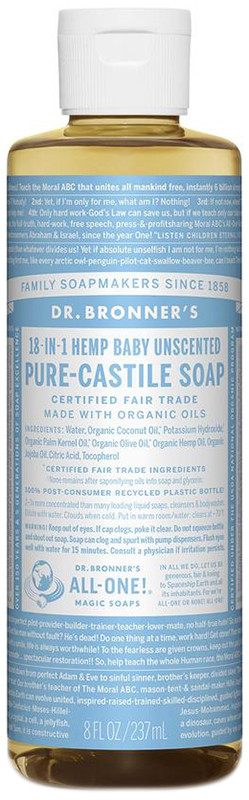
You may also try Dr Bronner’s liquid soap. However, Dr Bronner’s liquid soap is significantly more expensive because it is imported, and it’s bottled in plastic. This is why The Bear Necessities is my first recommendation – you will save money, reduce plastic, support local and come pretty close to using my recipe.
How was your liquid soap-making experience? Did you find my method easy-to-follow? I’d love to hear your feedback, so please share in the comments below.
Hi Christina,
Thanks for the lovely blog and recipes.
I was wondering if you could do a normal coconut oil soap with caustic soda, and when its ready, grate it and add to water to get a liquid soap? and can this liquid soap be used in shampoos?
thank you
Gaby
Hi Gaby,
I’m glad you are enjoying my blog. To answer your question, yes, you can definitely do what you’ve just described. That’s how I started out, before I was brave enough to attempt liquid soap from scratch. I’ve actually dedicated a separate recipe post to this method. Here is the link: https://naturalnerd.co.za/melt-and-pour-liquid-soap/ . And yes, you can use this grated liquid soap in shampoo recipes too. I just recommend using distilled water to dilute the grated soap – to extend it’s shelf life.
Hi Christina
I want to find out how you can extend the shelf life to more than 6 months after diluting the paste ? Can I just add Euxyl preservative to give it a longer shelf life and if so how much of the preservative should I add? Can I add 0,5ml Euxyl K100 preservative to 200ml diluted mix ?
Hello Denise,
Thank you for your good question. Unfortunately, Euxyl K100 will not be effective in preserving liquid soap, because it is only effective in products that have a maximum pH 8. Liquid soap is alkaline in nature, so it will test higher than pH 8 – usually pH 10. You could try to lower the pH of your liquid soap to pH 8 by adding a few drops of citric acid solution, and then add between 0.1-0.2% of the Euxyl K100. But you will never get below pH 8 with citric acid and still have liquid soap. Also, you must measure the weight of your diluted soap mix and work out what 0.2% of the WEIGHT is. You cannot use milliliters (volume). So for example, you would add a minimum of 0.2g or a maximum of 0.4g to 200g of diluted mix. Or 1 gram (min) / 2 gram (max) to every kilogram of diluted soap. Euxyl has a heavier density than water, so 1ml of Euxyl won’t weigh 1 gram, but rather 1ml = 1,075g. If you have a pipette, then you could measure 1ml of Euxyl for every kilogram of diluted soap paste. However, it would be better to find and use a preservative that is meant for alkaline environments (for pH over 8). Some options include Suttocide A (up to pH 12) and Glydant Plus (up to pH 9). These are tricky to find in South Africa, but I’ve seen them on some importing websites like Wantitall.co.za and Importitall.co.za . I hope that answers your question 🙂 . Here is the information sheet on Euxyl K100, if you’re interested.
Hi Cristina. Thank you for the great tips and advice on your blog. I want to make my own shampoo but I am unsure how long the Geogard Ultra I am using will keep the product bacteria free. Is there a testing kit available that can help me determine the shelf life of the shampoo?
Hello Linna,
Thank you for reaching out. Unfortunately, you cannot use Geogard Ultra to preserve liquid soap. I’m sorry to give you the disappointing news. You see, every preservative has its own requirements in order to be effective. One of the requirements for Geogard Ultra to be effective is that the product must have a pH between 3-7, otherwise it won’t work. That’s why Geogard Ultra is perfect for creams, lotions, makeup etc. However, soap usually tests at a pH 10. Using a few drops of a citric acid solution can help you get pH 8, but not lower than that unfortunately. Here is the information sheet on Geogard Ultra, if you’re interested. Having said that, you would need to use a preservative that is meant for higher pH environments. Some options include Suttocide A (up to pH 12) and Glydant Plus (up to pH 9). If you are determined to use Geogard Ultra, then you wouldn’t be able to make a soap-based shampoo, but would have to look into using natural surfactants instead like Lauryl glucoside and Decyl glucoside. You can lower the pH of surfactants to pH 5.5 to match the pH of your skin, without compromising the cleansing qualities of the shampoo. Whereas, you cannot lower the pH of soap lower than 8. If you try, it won’t be soap anymore. To answer your question, the length of time that your shampoo will be preserved depends on your exact recipe. Every formulation will test differently. Unfortunately, there is no simple home test that can do this for you, but you would have to get the formulation tested by a lab / microbiologist. This is what cosmetic companies do – they send their formulations for stability and preservation testing to determine the exact shelf life of their recipe. I hope my answer gives you clarity on the options available to you.
Hi Christina, thanks so much for your recipes. I’m very chuffed with my basic soap bar. Now for the liquid soap and other cleaners! Question: can I use lemon juice ( instead of citric acid ) to lower the pH ? Cheers, Mark.
Thank you for your feedback Mark. I’m happy to hear that your basic soap bar was a success. I am confident that I will hear the same about your liquid soap. It’s always great to hear that my recipes are appreciated, so thank you. To answer your question, yes you can technically use lemon juice instead of citric acid. Lemon juice will reduce the pH since it is acidic. And lemon juice naturally contains citric acid. By the same token, you could also use vinegar, which is also acidic. But don’t add too much, because too much acid in liquid soap would destroy the soap. However, ingredients like lemon juice contain mostly non-distilled water. So this would contribute to the soap having a shorter shelf life. That’s why I recommend using citric acid, or making a dilution of citric acid with distilled water for the best shelf life. However, I must admit, when I am too lazy to make a citric acid dilution, I just throw in one tablespoon (15ml) of vinegar per 500ml to reduce the pH. This is just for my personal use though. I believe vinegar will have a longer shelf life than lemon juice. I usually use white spirit vinegar, or clear apple cider vinegar. I hope that answers your question. Have fun 🙂
Hi Christina.
Thanks for this recipe, it’s going to save me so much money.
A few quick questions:
– when thickening my liquid soap, can I use Himalayan salt?
– do I use the xanthan the same way as I would use the salt?
– when my liquid soap is made, do I further dilute it when using in the home, or is it at the right ‘strength’?
Hello Hainley
It’s my pleasure. Thank you for following and supporting my blog. To answer your questions: (1) Yes, you can use Himalayan salt. (2) No, you do not use xanthan gum the same way as salt. You usually hydrate the xanthan gum with a bit of glycerine to make a paste. Add that paste to hot water on the stove until it dissolves and forms a gel. Then you add your soap paste to this watery gel, and let it sit overnight to liquify. (3) No, you don’t further dilute the liquid soap for home use. It is the perfect strength. For household cleaning, I often use even less water so that it is more concentrated, or I use the soap paste directly without diluting it. That’s what I’ve done for washing dishes. Let me put it this way – the soap paste is actually the right strength. It is strong enough for cleaning, but yet not to strong for cosmetic use either. Sometimes I use the soap paste to wash my hands even. Soap is a very a mild product in terms of “harshness” to the skin. It’s not anything like the retail surfactants that you’re used to (i.e. Sunlight and bleach etc.). When you add water, you make it a weaker cleaner though. But the water makes it easier to use, and it stretches it further so that you can use one soap paste batch for longer. I hope that helps.
Hello! since Catalonia I love your blog, I already made liquid soap 100% coconut but with a superfat of 1 could you tell me how much is overfat that of your recipe?
Hello Montsita, thank you for your feedback. This recipe has a zero percent superfat – in order to be a customizable base, and suitable for household cleaning. For skincare recipes, I usually increase the superfat by adding oils to the ready-made liquid soap to make it more moisturizing. I hope that helps you 🙂